| September 2, 2004 | HOME | ||||||||
In the morning I dimpled the lower wing skin in preparation for attaching the flap brace and the flap hinge (a full-length piano wire hinge).
Dimpling the flap brace itself, went quickly in the c-frame -- much better than squeezing.
The plans call for blind rivets almost full length. I decided that, with Bill's help, I could use real rivets in the last 3 positions. With a little pain and some patience, we managed real rivets. Maybe a minor thing, but I hate pop-rivets.
Oh boy! An early lunch! It was much better than it looks in the picture. Bill picked some fresh tomatoes and make a chicken salad with left over chicken and some avocado. OK, now I'm re-energized!
On to riveting the flap brace. It was tough getting my hands in between the wing skins and I had barely enough strength to pull the steel rivets. It finally got done, but I hate thinking there is another wing yet to do.
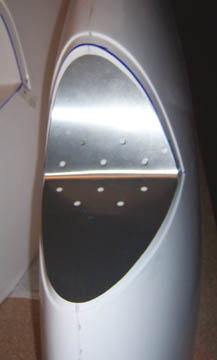
But here it is. The flap brace for the left wing is in and riveted and ready to go!
|
One thing I'm paying attention to, are the places where 2 pieces of metal come in loose contact like this end piece of the flap brace. There is no recommendation from Van's about dealing with this, but it really is a potential problem area. There are lots of airplanes flying around that have or have had, cracks in the skin from vibration that could have been avoided by not allowing two pieces of metal to rest lightly together. The simple solution is to bond the metal pieces where they cannot reasonably be riveted That's what I've done below with the flap brace. It probably is not critical here because the critical metal piece (the rear wing spar) is rather thick, but it is a practice I'm applying uniformly.
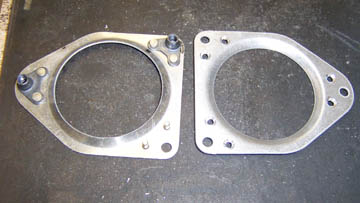
While I worked on the wing, Bill continued to help with the wingtip lights. He's installing a pair of landing light brackets from CreativeAir. They're simple and easy to install, but he is changing things a little in order to clean up the appearance of the installation. We'll see how it comes out. He's riveted nutplates on the brackets to accept the adjustment screws.
He plans on installing the brackets behind the fiberglass in the tips and has drilled 2" holes in the support plates he made up.
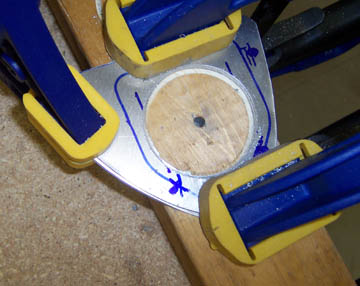
Meanwhile, Bill has built a replacement pair of plates. They are drilled for the new location of the LEDs. He will have to drill 2" holes to match the landing lights and 1" holes for the strobes, find a way to attach the whole thing without any protruding screw heads, fit the lens over it and that's it. He'll be all done. Then it will be time for me to find him another project....
Previous Day | HOME | Next Day |
||||||||