| September 19, 2007 | HOME | ||||||||
There has been a long hiatus and there will be another, but today, I'm back to working and jumping right into installing the boost pump. Since this will be a FADEC airplane, I need the same boost pump as any fuel injected system. The auxiliary pump from Van's comes with a base plate to mount the pump directly in front of the normal fuel valve location in the RV-7.
The auxiliary pump sits on the base plate as shown below. I seem to recall that the pump came from Van's completely assembled. This one didn't, but one of the pieces of tubing was pre-bent with fittings, so that was a good start.
I found it was a bit of a challenge to get the tubing lengths right on such a short run. After several attempts at measuring, I just eyeballed it a bent the tubing accordingly.
I loosely assembled the pump and checked for fit, but before I could really check it, I had to assemble the fuel valve. After buying a replacement valve, I decided to use the Van's valve after all. It works fine and checking it out in other airplanes left me convinced I'd be happy with it. Each of the fittings, including the plug, are coated with a setting-type sealant approved for fuel. It's important that none of the sealant end up floating inside the fuel lines, so the sealant is applied only to the male parts.
Yes, I thought I was paying attention and being careful to get it right, but I installed the wrong fitting in the output port of the fuel valve. I went per plans, but the high-pressure auxiliary pump setup takes a different fitting. Just a little more rework.
Here we are, the correct fitting pointed in the right direction and ready to go. It's funny how you waste a lot of time on the little things...
|
No! That's not my hairy hand drilling out a #8 screw for the static line. It belongs to Dennis. Dennis is always happy to help and a volunteer for the things I don't like to do is always welcome.
The drilled screw is inserted through the fuselage (one on each side). Tubing is slipped over the inside screw extension (I glued the tubing to the screw) and the vent hole that was drilled through the screw is open to the tubing. That make the static ports and a simple and cheap static system.
On the outside (of my very dusty fuselage), the screw head looks like a normal countersunk screw in a row of rivets. Just remember to temporarily plug it with a toothpick or something when you paint.
I did have a little problem getting the squeezer in position to dimple the hole for the screw. It would have been a little easier if I had turned the fuselage back onto its belly.
A piece of clear plastic tubing is routed between the left and right screw and secured with zip-ties. I well add a tee fitting at the appropriate location and bring the static line forward. That's for another day.
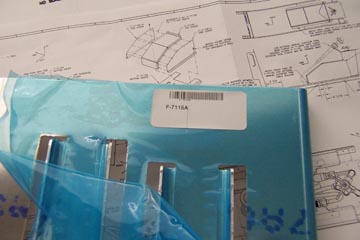
Getting back to the fuel pump, I roughly marked out the modification of the F-782C that is required for installation of the optional high-pressure auxiliary pump. I want to work a little longer and at least get this plate cut, but I guess I'll have to call it a day. It is getting dark outside...
Previous Day | HOME | Next Day |
||||||||